|
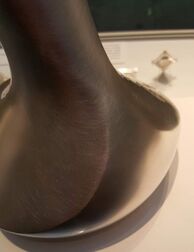
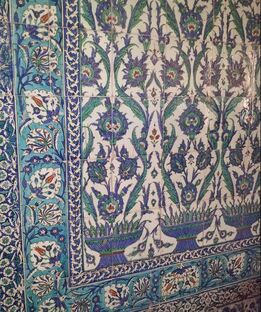
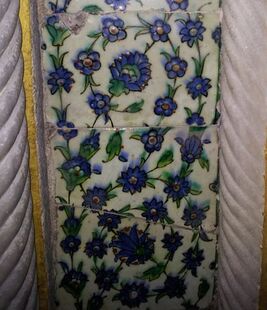
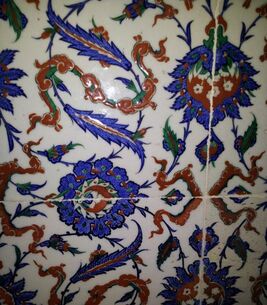
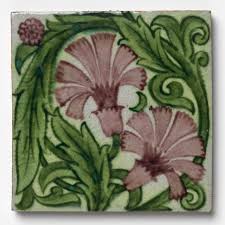
II have always liked the curvy patterns which predominate in Islamic art, so was keen to go to see the exhibition at the British Museum. i was a bit disappointed but it was my own fault - I had failed to realise that the show was not really about the influence of Islamic art on British culture; rather that it focused on how the Islamic world inspired Victorian 'Orientalism' and its influence on painting styles. As a side issue it also briefly considered interior decoration. I did come away with a better understanding of the context of William de Morgan's tiles and ceramics. They displayed some original Islamic ceramics 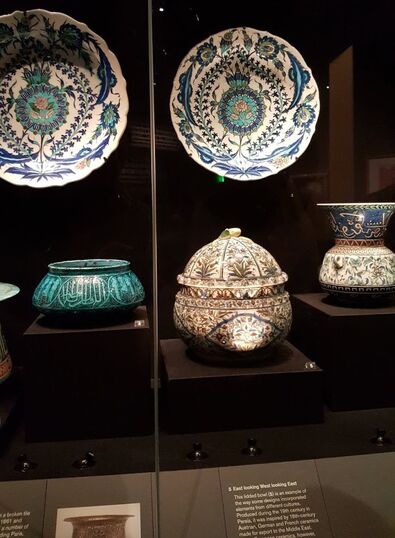 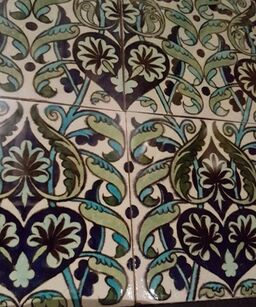 along side these de Morgan tiles. I like these and would love to be able to design them. However, along side the original tiles which probably inspired him, (still to be seen in Istanbul, Lisbon and other previously Islamic predominant areas), they seem a bit too controlled, too regular. Am I being hypercritical of William de Morgan's designs ? Here are two more of his 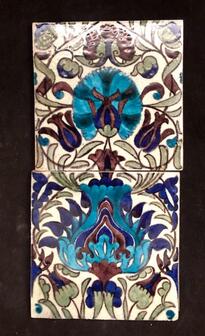 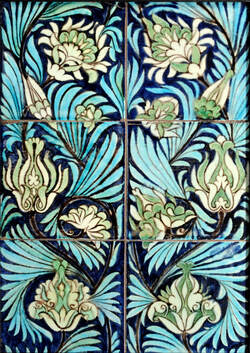 For comparison here are some pictures I took in Istanbul in 2013. They are less 'finished ' but a lot freer - and of course a lot older (400 yrs?), being originals in the Topkapi Palace.
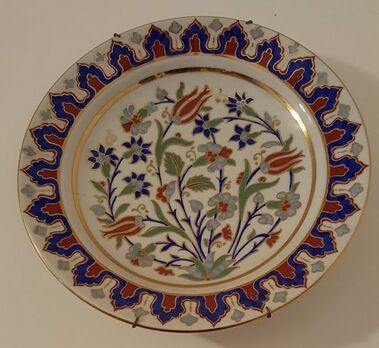
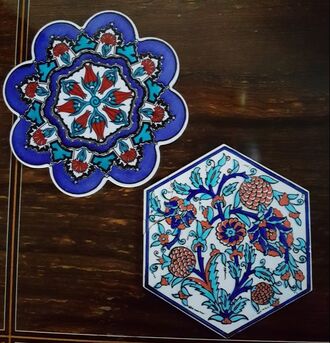
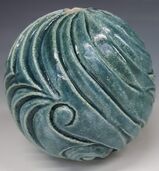
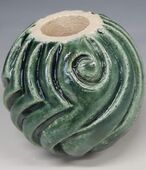
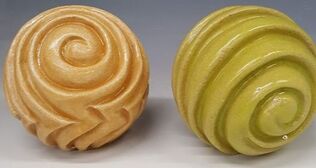
These below are contemporary pieces - a plate from Ismir given to us as a present and potstands bought in the Istanbul Souk. Again, I prefer these to the William de Morgan example perhaps because of the asymmetry.............
 In the permanent exhibition galleries...
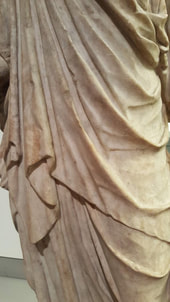
there were lots of examples of early Athenian and Roman art. I particularly liked the carving on this small Italian image of Isis, an Egyptian goddess associated with fertility and motherhood. It was made in about AD 120-150 in marble. Now I am trying to carve clay I have a new appreciation of the skill and artistry required!
0 Comments
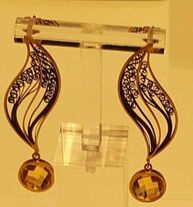
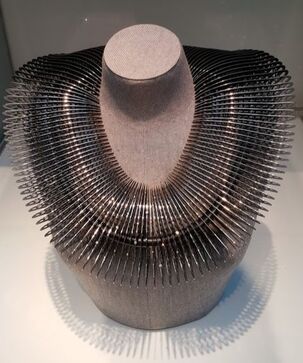 I go past the Goldsmiths Centre in Farringdon at least twice a year and usually pop in to see their latest exhibition. This time award winners in various categories were on show and their work was stunning. There were no prices on display; many of the pieces were 'master pieces' by apprentices and would not be for sale, so there were no distractions from a knowledge I could not afford to buy. From a personal point of view I am interested in jewelry. 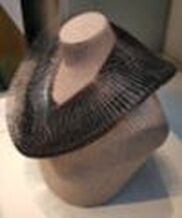 This item provided the poster image for the exhibition. It does not look too comfortable, and you would not dare to drop food when eating, but its a real show stopper. Part of its fascination is seeing the constituent pieces and their shadows from different angles. There are a few diamonds scattered down the front as well, but they are tastefully discrete - nothing more than a standard engagement ring size!
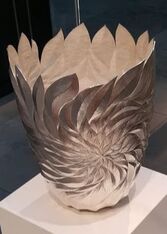
My favourites, however, were from the different discipline of silversmithing - beating and 'chasing' the precious metal. 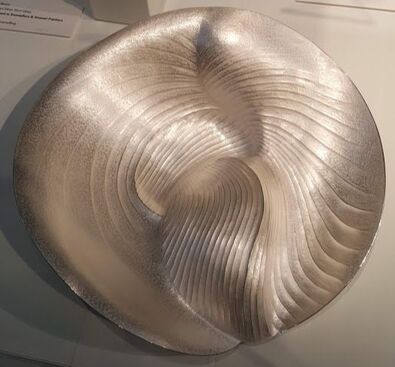 this Amesiella Dish by Jessica Jue won a ' Silver Award in Chasers - Junior'
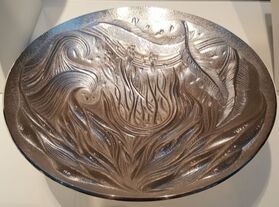
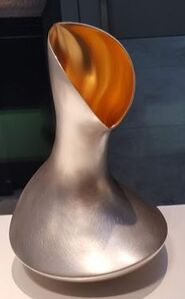
 though the design of the other side of his 'Gin Carafe' was more distinctive. 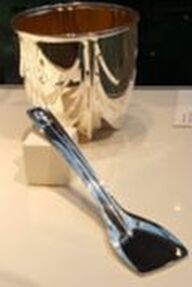 Finally, does this silver bucket and spade show where art departs from utility?
This years assessment was on 17th January, With Dave Binns and Rob Parr. We were asked to present progress since the last formal assessment in May. My developing thoughts had been set down in an updated learning agreement, a power point presentation (prepared primarily for my peers in class), sketches, and of course a display of representative samples of my work. It was also an opportunity to assemble and test my water feature. 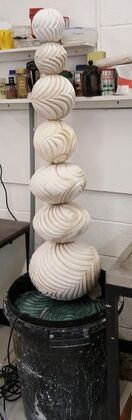 I set up in a borrowed waste bin, propped up the base plate with bags of clay, supported my central copper pipe (encasing the water supply pipe) with more clay, added bisqued pieces to make up roughly the correct height and turned on the power! As you see, water is flowing over the surface and down the carved channels from the 8mm diameter plastic pipe which reaches to the top. The pump has been turned to 'minimal', so with greater power, and a cone shaped reservoir in the top piece, it should flow nicely down several sides. With greater power still it should drop from layer to layer, creating the sounds as well as visual effect. The flow and the visual effect should be enhanced when I have the coloured glaze on. This assessment was timed only a few weeks after I had developed a satisfactory glaze, so I had only a few coloured forms (some of them very experimental ) to put together to demonstrate a totem and cane toppers. Here they are anyway. 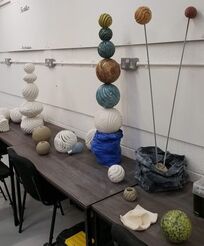 Our detailed discussion focused on spacers, a better design for the base plate, and how these pieces could be presented in the MA show. I made lots of notes. Why a better design for the base plate? 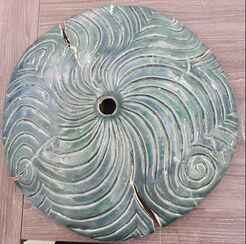 Well, a closer inspection than in the first photo above shows some pretty catastrophic cracks.
It needs some built in support on the back. I am also proposing to build the next one with rolled slabs, joined together using James Oughtibridge's method and carved when much drier. These adjustments should allow me to make a plate with a much more even edge and thickness, saving both time and clay. 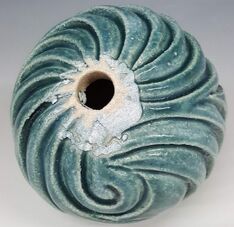 I have not been happy about the results of using wadding to support the forms during glaze firing. The wadding has left marks that I cant file off, and although they may be hidden when the pieces are stacked, they extend surprisingly far and would be more visible if on the upper surface. My tests so far have been with relatively light pieces , so this problem is likely to be worse with the larger ones. As I wish to leave the construction flexible, allowing the purchaser to decide what order the pieces go on the stack, and which way up they prefer, I want to avoid any marks at all.  Because the glaze does not appear to run (flux) at my cone 8 firing temperatures, and because I now incorporate a flat ring in my design, I may not need a prop to keep the glazed form off the kiln shelf. There is an alternative option, that of using a bisque fired stand. Here is an example I made whilst on an Annie Peaker course. Once the prop is covered in a generous layer of batt wash the supporting edges are not so sharp and the system will need testing with a real glaze firing 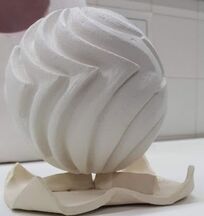 The arrival of my glaze stain order from CTM allowed me to try out another colour. I had only two remaining test tiles. I reviewed previous tests, decided on quantities and went for it. Here are two more glazes for my UcA4 range 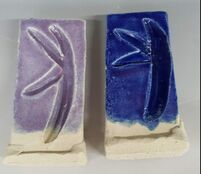 I am very happy with these two. The first has fuchsia stain and cobalt and the dark blue is cobalt alone. I had been trying to make a lavender colour by adding cobalt to chrome tin pink and although that works, it seems a less predictable option and the glaze is very opaque, out of keeping with the rest of the range, so I will stick to this stain/oxide combination. The next test was to try these glazes on the actual forms. I used my 'test pots' but with more glaze binder added, then brushed on 3 coats.
I was pleased with the results;. the glaze has not run, though might if it were thicker. Also, with these semi transparent glazes I do not think any underglaze is needed to emphasize the dotted texture.  Though this was with a glaze that had worked perfectly as a test and had not been changed, some pitting developed. I had tried to clean up the bisque ware before glazing, using a brush, under extraction but there may still have been some dust.
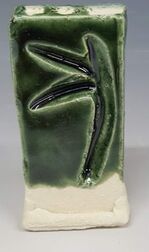 I have tried a number of base glazes now, together with a couple of specific ones like Jeanine Vrines' orange. I started by going through books by Greg Daley and Linda Bloomfield, articles in Ceramic Review and Clay Craft, trying glazes suggested by senior colleagues and later using the Glazy website to get an idea of the effect of changing components of a glaze recipe. Information from ceramic material suppliers such as CTM and Potclays was also very helpful. My fifteenth glaze (UcA 4, a 4th adaptation of the UcLan transparent recipe, this one with Talc added ) appears to be the most promising yet. I have added glaze binder and applied three coats with a brush, then fired to 1260 in oxidation. This test tile is on Ashraf Hanna clay, but I tested UcA 3 on both ES 40 and Ashraf Hanna, and there was no appreciable difference in colour or fit. This green glaze has copper carbonate 4% and cobalt carbonate 0.15% added to the base recipe, plus twice as much of the glaze binder than those below. There are no bubbles so I will continue in my next attempts with more binder. 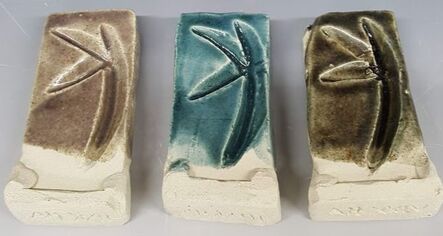 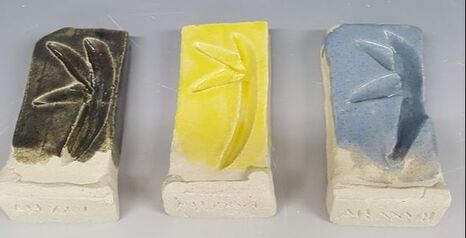 Not all the oxide / stain combinations were good in this test series and some adjustments are needed, but at last I am hopeful, and feel I can progress from test tiles to trying them on the carved pieces. 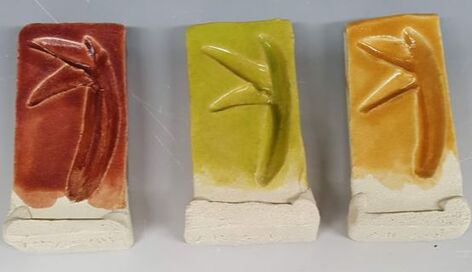 When I came back from the Christmas break I inspected my experiment with glaze binder. Wonder of wonders the lumps appear to have dispersed and I had one pot full of set jelly and another of runny honey. I made some more glaze tests, (using a slightly adapted recipe I have called UcA4) and a pot of 1Kg glaze with Copper Carbonate 40g and Cobalt Carbonate 1.5g added, together with 100g of my thinner thickener. I do not, of course, know the weight of granules that made this up, but did not want to use more of my glaze binder for the moment.
Fingers crossed. |
AuthorI am indulging my passion for ceramics by undertaking studies for an MA at UCLAN Archives
August 2021
|
 RSS Feed
