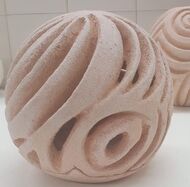
 This lantern is the same basic sphere, tapped down to create a flat base then carved. I then cut the base off as smoothly as I could, including a locator notch. There is a small hole at the apex through which to thread a chain and loop as I expect the lantern itself will become too hot to handle once a a tea light has been burning inside. This lantern is in craft crank, made prior to my decision only to use ES40  Version 2 This is a similar design in ES 40 clay. It has 3 notches to match up top to base. In practice these are difficult to match first time, so although they give a more stable fit than one, this design is less practical. 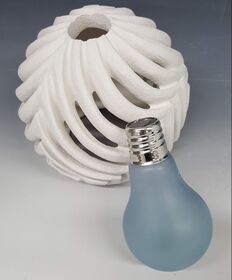 Version 3 has an open base (visible through the cut out areas) large enough to accommodate a hand and solar light bulb, and an opening at the top into which the light bulb fits. The light bulb would be glued in and cut out if a replacement were needed. The hole looks too large now but will be smaller after glaze firing. Learning points!
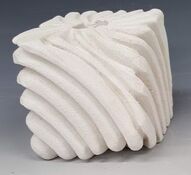
trying that cube
0 Comments
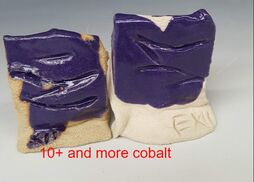
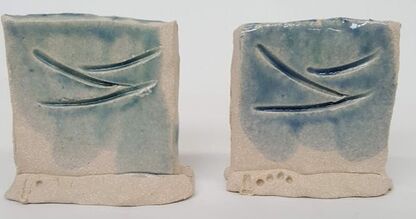
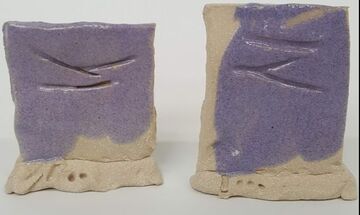
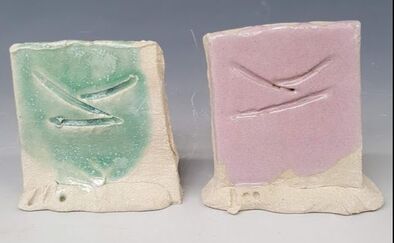 I have tried out two more glazes from Linda Bloomfields book: Chrome tin pink (1260 in oxidation) and Micheal Bailey's sea green crystalline matt also fired at the same temperature. I also tried both glazes with cobalt carbonate 1% and 2% added. I like the lilac/purple glaze and will probably use it for my final range. Unfortunately the sea green is a little too translucent and runny.
After the talk on glazes we were tasked with making test tiles with single ceramic materials. My share was to look at the primary fluxes. I made a set of standard 10x5cm test tiles in Ashraf Hanna clay, which were bisque fired. Each of these 5 flux materials were simply mixed with water to form as suspension and poured onto the tile. here are the tiles: 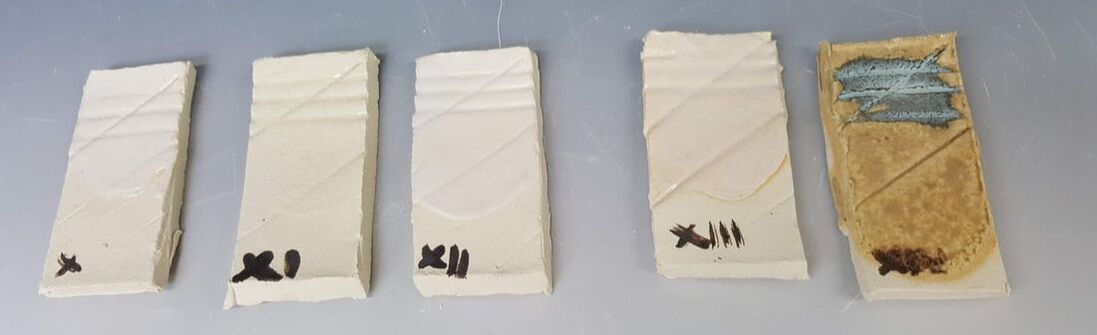 In order these are:
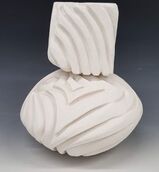
X potash feldspar XI soda feldspar XII cornish stone XIII nephtheline syenite XIV wood ash (sieved but unwashed) I have subsequently left a suspension of the mixed wood ash to soak for 2 weeks and poured off the liquid, replacing it with fresh water and retesting 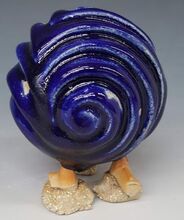 Last Friday, the 17th, we first years had our first formal assessment of practical work. We had to submit the latest learning agreement, a short summary of where we have come from and are aiming for, and practical work to be assessed. We therefore got to see the others' work to date (I am the only one who works solely in UCLAN ) though obviously all the assessments themselves were private. Dave as tutor did the assessments with Micaela as second opinion. I had a few test tiles and a glazed sphere hot out of the kiln and still to be photographed. I had glazed the small carved sphere by dipping in a new batch of 'DBG' with 5% cobalt. Horrible. The glaze went on too thick but still left bare patches, possibly due to air pockets; and ran, though not as far as the kiln shelf. Spraying the glaze on might work better. We discussed shapes and how they might relate to each other. I have been persuaded to carve a cube in the same style. We also agreed I should stick to ES40 clay, try working on less runny and glossy glazes ( as the light reflections can distract) and work further on the patterns. All very helpful and will give me lots to record in this blog... ,Dave encouraged me, right from the start, to be bolder and for the carved pieces, go deeper. Fine, where I had a good depth of clay to go into. Unfortunately on the latest 'flying saucer' shape I did not pack enough clay into the mold towards the edges, so when I carved I went through. As this is not a good shape for a lantern, I could not use it as an advantage, so the only option was to patch from behind. Time will tell if this has caused problems. 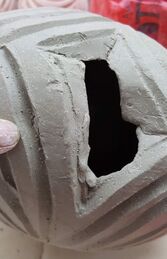 I cut out a shape from the piece, added more clay from behind as far as I could reach where it felt thin and replaced the patch. 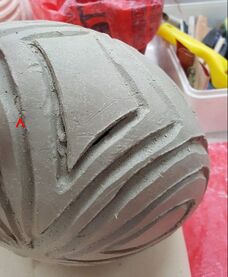 The repaired hole is indicated by my finger on the photo above, and by the ^ on the picture here. I have wrapped the piece and left it to settle before carving more and finishing it off Unfortunately, for the lanterns I appear to have made the walls very thick, so although that's made them stronger even deep carving does not go through to make nice holes, so I have had to carve from inside too. Lots more clay to recycle!
The UCLAN ceramics department transparent recipe for stoneware is very simple: Cornish stone 25 China clay 25 Whiting 25 Flint 25 Have stains, will test......  from L_R these have 6g fuchsia 5g intense red 5g yellow 5g tangerine 5g intense red and o.2 g cobalt these were all fired 1280 deg C in reduction which will have affected the colours, so I am redoing the glaze tests in oxidation too. Claycrafts magazine has been publishing articles by Linda Bloomfield with glaze recipes, so I have tried a couple of these too. Both are fired in oxidation . The left hand pair are 'David Leach Satin Matt Purple' but I suspect I made it up incorrectly. 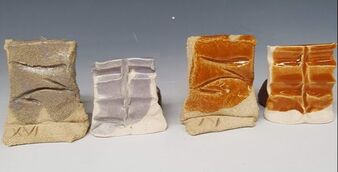 the right hand pair are from a recipe by Jeannine Vrins called tangerine, and should be fired cone 6-8. The instructions say that for pink, you omit iron and that if the zinc is <10% the recipe will make brown. I like this toffee colour but will try the recipe with a little more zinc (11 or 12, not 10%) to see if this is more tangerine. ( PS it was not) 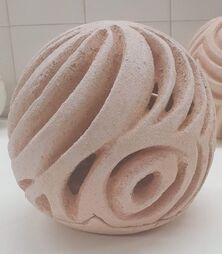 I have tried out a lantern shape, basically a squashed sphere to hold a tealight. It is designed with a small hole in the top for a metal hanging chain and loop so that it can be lifted easily off the separate base. The base has a location lug.
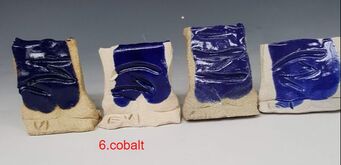
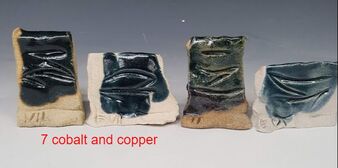
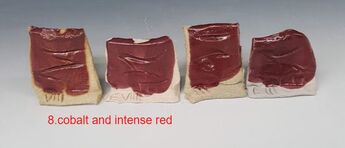
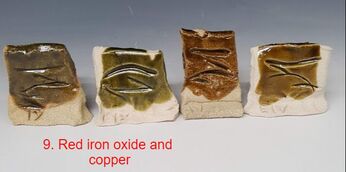
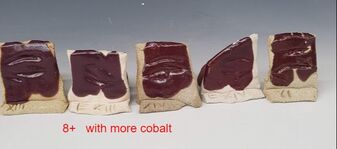
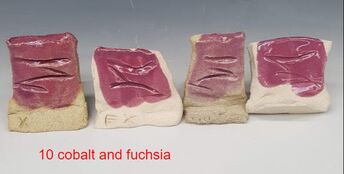
The lantern is made in craft crank and in retrospect I realise that I should have coated the inside in white slip to make it brighter. Now I have the glaze challenge.... I will try this concept in different shapes, in ES40, and a variety of glazes. I will also adapt for solar lighting. I was not completely happy with the Greg Daly glaze as a base for the range of oxides. Perhaps I was asking too much; it was after all designed for iron. I asked an expert, and Dave suggested an altered recipe (now known to me as 'Daves Base Glaze' which I have tried out with various oxides and some stain added on both ES40 and Craft Crank in oxidation (1260) and reduction (1280 degrees C). Here are the results:
 some of these with both oxide and stain are a bit spotty. I have learnt three things: 1. some stains act as an 'antiflux' (probably not the correct term!) and 2. I should sieve after the stains /oxides are added. 3. I have not found all the colours I want yet More tests! |
AuthorI am indulging my passion for ceramics by undertaking studies for an MA at UCLAN Archives
August 2021
|
 RSS Feed
