|
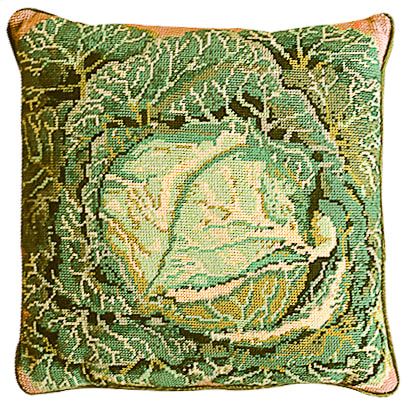
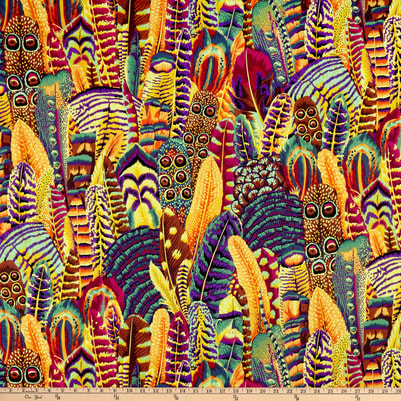
Yesterday I was at college in Preston, but for an hour or so put the mud to one side and watched a lecture by Kaffe Fassett. It was broadcast as part of the 'Festival of Quilts' but was purely about colour. He talked about colour contrasts within a 'palette' and being more adventurous about combinations, giving lots of examples. Ceramics can too often be beige and shades of brown; subtle and beautiful but dull. With textiles, where there is less scope for exploring form and texture, practitioners seem to get more exited about colour. Is this a fashion phenomenon, people influenced by peers ? Is it because its easier to play with colour when what you see in making, is you get? Is it because of a greater predominance of women? Certainly I experienced my visit to the Knitting and Stitching show (Harrogate, 2018) as being an endless sweetie shop of pleasure and inspiration, immersed in colour to the point that it was almost too much to take in. Like eating a whole cake. Potfests don't have quite the same effect; instead they induce a more meditative mood whilst making my fingers itch. With any experience there is, somewhere, a perfect balance for that person. Satiety without indigestion. Colour and colour combinations excite and nurture me. Plain neutrals by themselves can be negative. I first encountered Kaffe Fassett's designs when I started making wool cross stitch cushion covers about 40 years ago. The ones I made had a blank canvass and colour charts, with numbered skeins provided. Sort of tapestry by numbers without guide lines. Kaffe Fassett kits were more expensive and more difficult. His best known one was the cabbage. Even on that one and the restrained peony below, the details are exquisite and the colours pop.
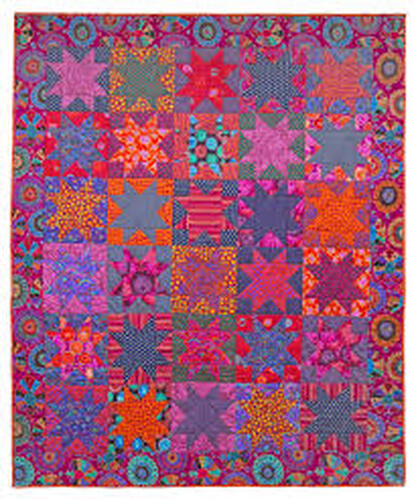
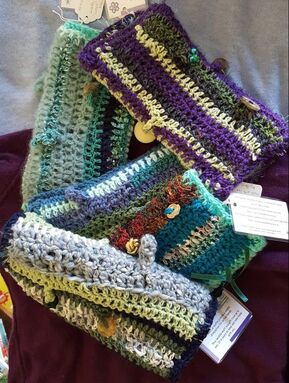
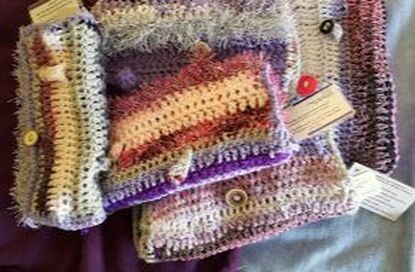
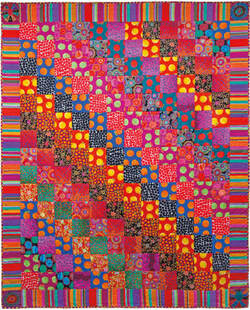 This quilt is an even more more vibrant example -and for me it has gone beyond rich to uncomfortable. Kaffe Fassett (b1937) must be one of the best known textile designers with a long and productive career. His bold use of colour and contrast, explained in the talk, has inspired so many. It has brought him commercial success too - endorsement of his ability to use colour to create a response in ordinary people. Over the last few years I have been learning more about colour combinations. I make 'twiddle muffs' for people with dementia who need to 'fiddle'. Its been a useful activity on the train to Preston! I use crochet and multiple yarns of different thickness and texture. As I make more I have found that the volume of colour is almost as important as the actual shade in creating a satisfying combination.
Back to ceramics!
Colour in glazes is a challenge, and I don't really want to expand my range, but I am tempted. I will try more and different combinations on the dotted pieces but using the same glaze range.
0 Comments
I have been keen to make some more plaster moulds, both to improve on what I have and to have a wider range of shapes available. A flatter elipse could look good though I would be concerned about strength so would need to insert struts inside. One of my larger 2 part spherical moulds is not spherical; it was made around a childs' ball, over several days. As the 1st half plaster dried it contracted, squeezing the ball so the second half plaster was around a larger form. OK but not good. In addition my carved shapes generate a lot of clay to be recycled so I needed a plaster batt too. So far, so straight forward, except that all the plaster in the department had been purchased before lockdown. Potters plaster comes with best before dates as it has a short shelf life. It absorbs atmospheric water and 'goes off'. All of the available plaster was almost a year past date. I tried making up a small test quantity and it seemed fine - smooth, no lumps, setting at a manageable speed.
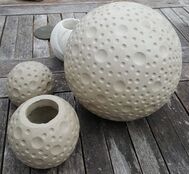
I decided to make a batt. I got advice from Rob. I found the boards, put them on a base, plugged all the gaps, soaped the boards and measured out 10 litres of cold water . So far, so straightforward. Ten litres is a lot of plaster and takes a while to add then stir. As with clay, it seems that when you double the size you quadruple the difficulty. The small 'test' was not a realistic indication. Instead of a smooth plaster box I ended up with an interesting mountain range. I made more and thinner plaster to smooth it out but still needed to carve it flat. Never mind, I have a smooth and usable side for wedging when it eventually dries. I have ordered more plaster to make new moulds. While my carved pieces evoke the movement of wind and water in the garden. The dotted, impressed ones represent the soil and all its varied organic and trace element constituents. They also recall the celestial orbs - our sun, planets and moon that have such an influence on earthly garden plots. Both the carved and dotted forms are burnished after the joins have been strengthened and the shape refined. Impressing the dots does not result in widespread micro holes and so far the glaze had not crawled on these except when too thick or I tried dipping not brushing. 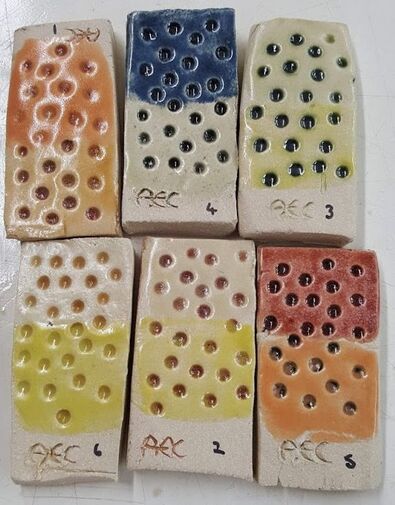 I had tried combinations of my glaze samples on dotted test tiles with the first layer wiped off, but not these combinations on the 'real thing'. Time to try on a few small cane toppers. Although I have designed the glazes not to run and these have flattened bottoms from which I will wipe the glaze, there is still a concern they will stick to the kiln shelf. I want good colour coverage and no obvious white base when they are elevated on a stick. I needed to test these on the dotted cane toppers, so made up some more glaze and applied. I used different thicknesses and layers of glaze, marked each piece, made careful records and waited for the fired results.  Slight hitch. I used blue underglaze crayon to mark them on the base where the hole was too small to do it inside the hole. I thought this was a really good idea, until I saw them after cone 6 firing and THE MARKS HAD DISAPPEARED!
these two retained a hint of the mark which has been touched up; the rest I have had to work on a guess. This is no good where there are so many little similar pieces. The glaze crayon worked fine where I had been able to mark inside the hole, but for these I will need to move on to using manganese in suspension. I have quite a few carved pieces that have micro surface holes but which are otherwise good shapes with parallel tops /bases and threading holes which are sufficiently large to accommodate my chosen pipes. They are far too good to waste and I only need so many 'tests' so how do I rescue them? Slip, officially not allowed on bisqued ware but described on previous blog, or engobe? Lets start with the engobe. Well, when re bisqued it's cream not white, which is a disappointment, but it may fire white at full stoneware temperatures. It was more difficult to apply than the slip when I was aiming to fill all the micro holes, so I thinned it, then thinned again. When I thought I had filled the holes with the (admittedly thicker) engobe some reappeared on firing. The engobe also remained chalky and powdery, likely to be a problem with glazing, but if I fire above 1200 C will it hold the glaze?  PS I fired to 1080 C in case that was enough. The surface was no longer chalky but it was crazed. Not looking promising. 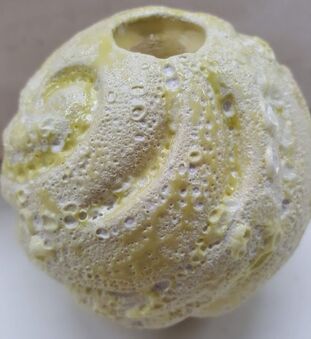 This one had been taken straight to stoneware glaze temperatures. Engobe (as found in the UCLan department) has been tested and found wanting. Time to abandon it. What about decorating slip? I have tried it on a bisqued piece and refired. White, and no sign of flaking seen so far, maybe because of the flint content acting as a flux There were some remaining micro holes so I will try again with thinner slip. 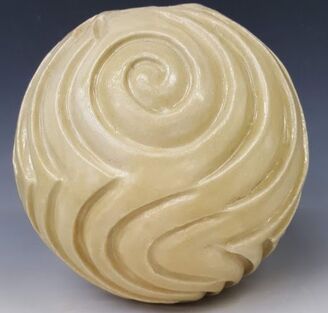 This is glaze UCLan 4/ 23; my final base glaze with yellow ochre added and fired to 1260 in oxidation. The piece had been slipped post bisque, refired then one thin layer of glaze then two thicker ones brushed on.
The piece has problems with cracks but the actual surface is much better so slip, on greenware of if necessary on bisque seems to be the solution' Even if some holes remain, putting a thin layer of glaze on first before two of standard thickness seems to be helpful. Rob and I reviewed some of the pieces I had glazed prior to lockdown. There were the ongoing problems of pinholing and crawling in addition to the glazes being patchy and not turning out quite the colours I expected from the tests. Perhaps not too bad from a distance... 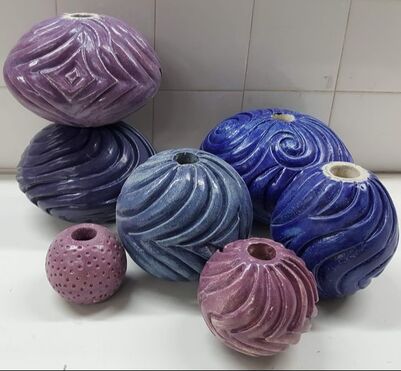  But close up - no! Rob suggested some of the problems might stem from dust or oil from hands, and that I should give them a wash and brush up before glazing. I will also retest the bigger batches of glaze after I make them. For some colours, for instance the pale purple / lavender above very small differences in cobalt composition and thickness make a difference to colour. Position in the kiln may do too; I will have to make more notes. 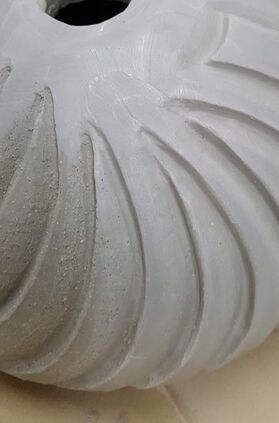 We also discussed a different surface treatment: applying white decorating slip to the freshly carved pieces rather than sponging down, in order to fill the micro holes created by movement of grog. It certainly creates a smoother surface. Even with quite this slip, seived through a 100 lawn mesh, the slip is difficult to get into all the holes, needing a little firm rebrushing. I have put on 2 layers and hope that when fired it is sufficiently smooth and even. I will have to check whether the holes have reappeared. This picture shows the difference made (from right to left) by one layer of slip applied with a firmish brush. The white decorating slip recipe I've used is 50 ball clay 50 china clay 10 flint which will create a whiter surface on the ES40, making the glaze colours brighter. I also emailed Valentines Clay regarding a slip recipe for this clay; Alan replied suggesting 75% ball clay 25% china clay I will try this if the 'fit' is poor on my pieces For those pieces already bisque fired Rob had advised that I should apply white engobe then refire. The results are on the next blog!
 The Covid 19 pandemic is not over but after 6 months we are now back at UCLAN with new rules and precautions
-it feels so good! During our lockdown /course interruption /exile from our ceramics MA home I did some smaller pieces in ES40 clay and bisque fired them. I was able to develop some new ways of working and a new surface pattern trying to avoid the 'golf ball' look. There were failures too; shapes that 'blew' or cracked; times when life at home was too much of a distraction and I left pieces too long to get too dry. What did I learn or do differently?
There were other changes in UCLAN during lockdown. Professor David Binns has retired (you can see his smile on an Instagram post!) and our lovely full time technition, Geoff, has taken redundancy. This leaves Rob Parr (3 days a week ) with the technical support of a recently well qualified MA Graduate Cath Criscenti (one day per week) for effectively 3 years of MA students at once due to the covid interruptions. We will have to try and nurture and support them, as best we can, as the scarce and treasured resource they have become. In the meantime how can we provide a socially distanced 'thank you' to Dave and Geoff? |
AuthorI am indulging my passion for ceramics by undertaking studies for an MA at UCLAN Archives
August 2021
|

 RSS Feed
