|
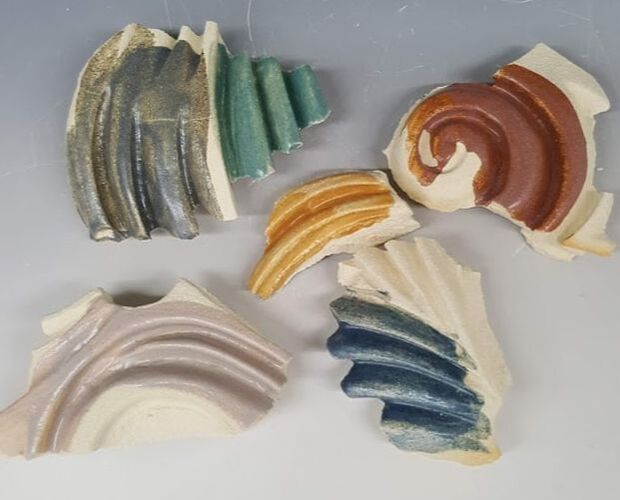
Looking for a good base glaze over July and August, my next trials were with 'Emmanuel Cooper Barium Matt' using the oxides recommended in Linda Bloomfield's book, and two of my high temperature stains, yellow and red, hoping to get yellow and orange glazes. Those tiles that looked a nice colour were pitted and runny , definitely not matt, whilst the stains fired out altogether. They had been fired in Test Kiln 6 set at 1245, so probably reaching 1260 with a 5 minute soak -so I have abandoned that glaze. The next trial was of another Emanuel Cooper recipe: Semi Stiff Clear Base Glaze, again with oxides and stains. The recommendation was to apply thinly but these were disappointingly dull and watery.   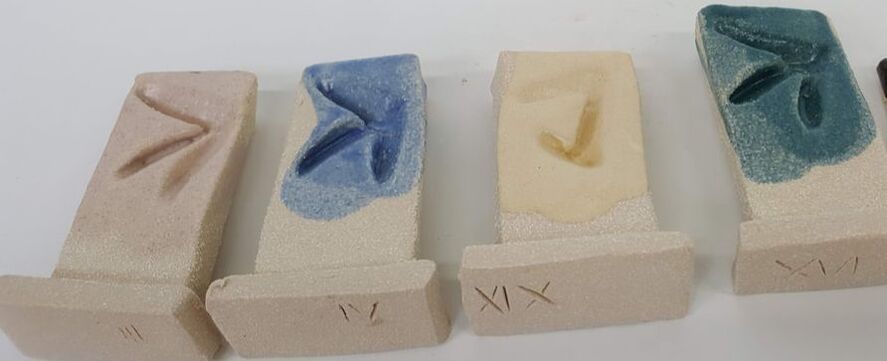 More thoughts on glazes! Just to recap, my ideal glaze range should
I reviewed the glaze tests done already and decided to try a modification of recipe suggested by Dave. The results were variable. The blues and greens were generally best but I am keen to have colours which contrast with the surrounding vegetation, to include oranges and red. I tried a series of oxides as well as the stains with the 'UCLan Transparent' recipe. The 'UcLan transparent ' glaze is 25 cornish stone 25 china clay 25 whiting 25 flint this recipe will fire as high as 1300 Having read that particle size can affect colour and not just evenness, I sieved the base glaze through both grade 60 and 100 sieves, and the test glazes through 80 and 120. They were all fired to cone 8. Some of them worked well, some not. In particular the ones with rutile were dull and pitted. I tried a further series of oxide combinations and we fired them higher to 1300deg C. Colours were brighter and better but they showed a tendency to run. Oh dear. I did some reading, took some advice, and tried a base recipe containing dolomite 10 and bentonite 3. It was horrible to make, clumping even after sieving through a 100 mesh, and the glazes were thin and flat even when fired again at 1290. I discovered the Glazy website! This is a free to use website where you must register and sign in. Potters post their glaze recipes and preferably a picture. It will act as a website library and a place to record your own recipes. The website analyses the recipe and will give both the amount of the molecular components and also where the glaze should sit on the Stull chart. You can then increase / decrease percentage components or add more and see whether and how its position on the chart changes -ie whether the change should make the glaze more glossy etc. Unfortunately I cannot yet work out how to factor in glaze firing temperatures. Next version of the glaze (UcA2) had less dolomite and no bentonite and was poured on to the tiles. The green (copper 4, cobalt 0.15) was nice but the other 9 were very matt and showed pitting and crawling . Was it because the glaze was too thick? The tiles dirty? Because I had used Ashraf Hanna clay? So I tried the glazes again, brushing onto Ashraf Hanna fragments and they did not crawl but were still unattractive.
More reading. The aim is for a glaze firing at cone 8 or below, as this puts less strain on the clay and the kiln, and thus is more sustainable . The next version has 5% talc which is predominantly silica and magnesium oxides with some calcium and aluminium. The CTM website stated that in amounts up to 5% it can improve maturity and melting of a glaze. They also advised that it should be thoroughly dispersed in water before adding to the glaze recipe.
Fingers crossed.
0 Comments
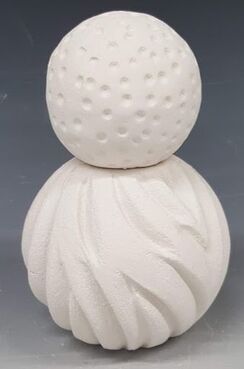
My plan is to make a range of ceramics for the garden - totems, water features, lights and cane toppers. Most of these items will need non ceramic components, for instance metal stakes, solar lamps, or a water pump. The fired diameters must be correct to fit, and I need to get to get to grips with some technical stuff, identifying the pumps, tubes, sealant etc that will work. My initial enquiries were at the water garden section of my local garden centres (-solar powered pump purchased but no good, mains electric seems more hopeful) but graduated on to the plumbers merchants and online metal tube suppliers. I bought soft rubber funnels from Morrisons supermarket. My latest visit was to B&Q where the staff, many of whom are in their second careers, were particularly interested in the technical challenge and impressed by my diagrams !. I came away with 3 meters of copper pipe (cut into two) and plumbers hose ditto, connectors, a length of soft 8mm tubing (to go inside the central pipe), and encouragement to come back with at least photos of the finished pieces. I also bought a spirit level and found that although I had thought I had fixed the problem of getting 2 holes to line up on the vertical, the outcomes were not consistently accurate. 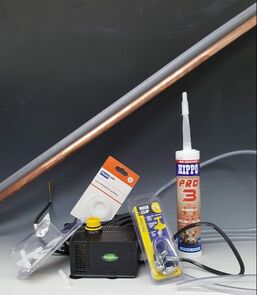 I had an informal review with my tutors Dave and Rob at the beginning of the month. We discussed some of my technical concerns, particularly around the strength of the base plate and the difficulties in ensuring that the central tube is well anchored and vertical. Rob came up with a brilliant idea - concrete! This will allow me to make a base plate which is more deeply carved ( to match in with the other pieces) yet when filled and reinforced with concrete after firing will also provide a stable channel to hold the vertical post. I will still need a reservoir with an anchoring point to hold the base of the tube, but this is not a design problem, just a task! We also agreed that I should make more small pieces so I can use them as glaze tests. The whole project is beginning to look a little less daunting. Life in the garden What about light? Its presence or absence is highlighted by shadows -again manifest on the carved forms. I am also making light sources - lamps - as stand alone pieces, carved through as I have described before. Should I try to incorporate these forms in the totems? The central copper supporting pipe would be visible.The other component of a garden which is not essential but for me important is colour. Tones can be muted, Monochrome can be calming and attractive but bright colours lift the spirits and convey energy. In a garden colour is usually supplied by blooms but increasingly people use hard landscaping and garden structures such as glazed planters and painted fences to augment the plants, particularly for the duller winter months. I have tired of my off -white clay. We need some colour on these ceramics!
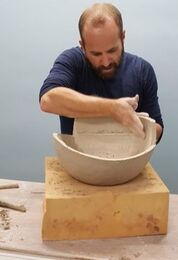
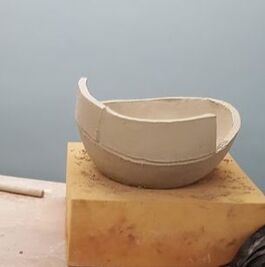
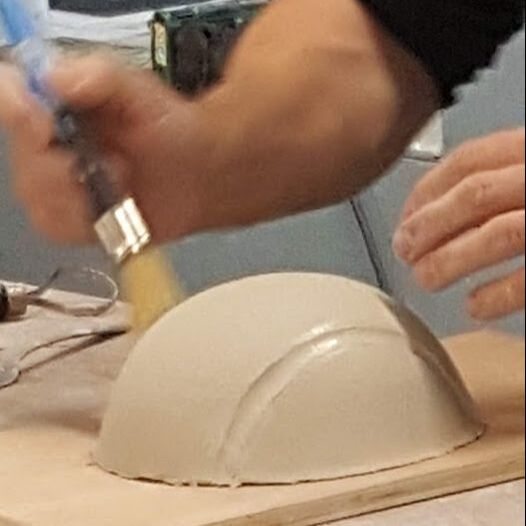
At the end of October, Mary and I took the opportunity to go on a 5 day slab building and decorating course with James Oughtibridge and Rebecca Appleby. The course is held in the Sculpture Lounge, a converted mill which now houses studios for artist makers in ceramics, metal, stone, and more. Many of these talented people run courses -so check out the website! Both James and Rebecca use firm slabs in Ashraf Hanna clay to make large hollow forms, but their style and approaches are different, which makes their course a very affirming experience - there is no one 'right way'. 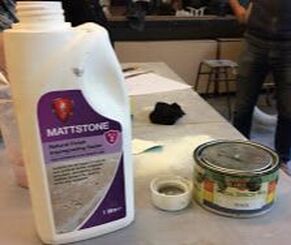 Rebecca's sculptures are designed for indoors but James's are not. What about the weather proofing? James only fires to around 1200 but then treats the surface with stone sealant to reduce mould/algeal growth and improve weather resistance. He is also prepared to return to purchased sculptures and give them a good scrub. That's a little warning about ceramics left outside! 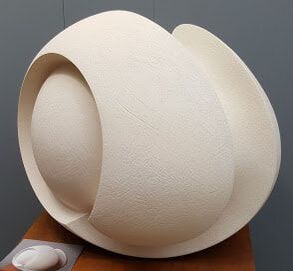 James may colour the clay body and in the past has used a coloured surface finish (though not glaze). He aims for continuous curves but makes them from slabs which have been dried in curved plaster formas then cut for construction, so that there may be as many as 50 pieces joined in a sculpture like this one. Not surprisingly the teaching laid major emphasis on how to join slabs! James opens the joins then reinforces both inside and out with coils before smoothing off.
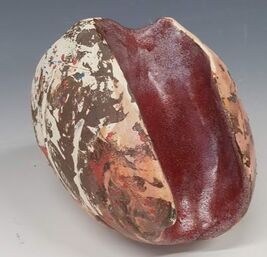
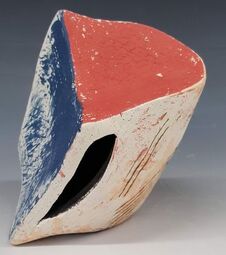
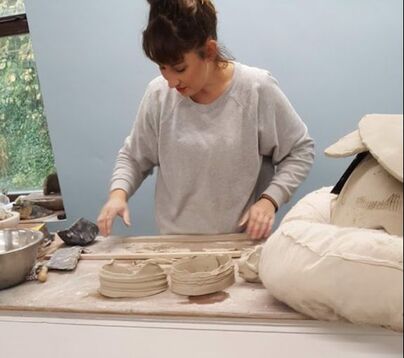 Rebecca is also a painter. Her sculptures are freer; also large and curved, but with flat planes and angles, texture and colour. After the initial hand building she may beat and alter the form, cut into it and even add wire. She uses very little glaze, but lots of coloured slip and underglazes. Although the clay is very pale in colour, she will cover the piece in black and then white to get the effect she wants. She demonstrated some texturing and printing techniques, and how she would make a torn edge. 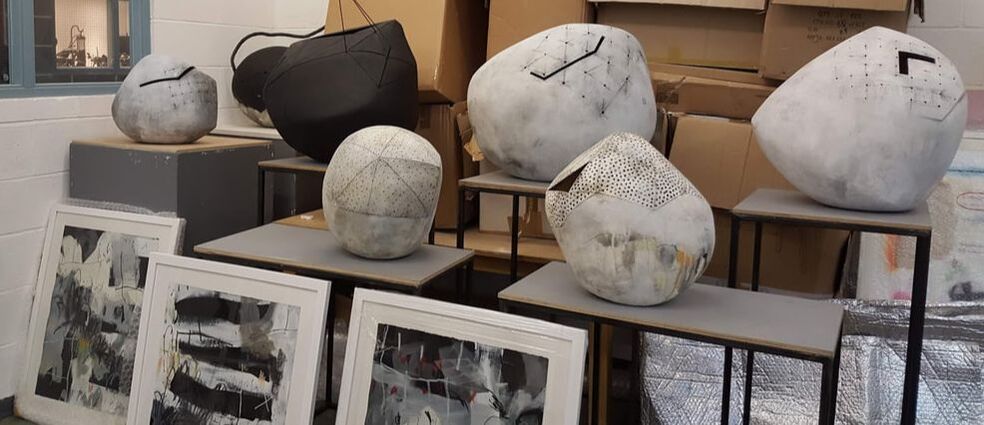 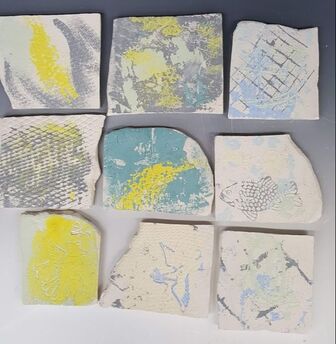 We tried these printing methods on tiles. These bisque fired slabs have slips and underglaze applied in the muted tones available. Of course these colours will be stronger if fired to stoneware temperatures. Rebecca will do lots of drawing before she starts on a sculpture; James draws directly onto a piece. Both will use 3D maquettes to try out ideas and that's what we did too -not least because its easier and quicker to work small. These are my three macquettes:
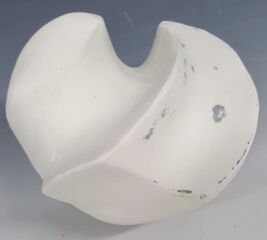
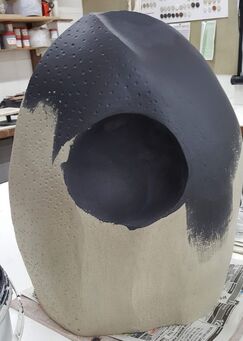
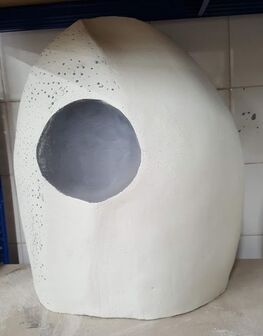
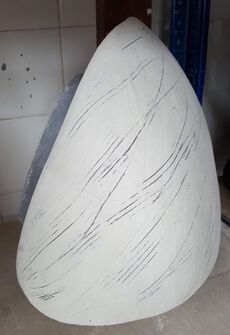
Deciding how to decorate was more of a challenge. The black then white base layers went on most areas but I decided to omit the white where I had definite plans to apply a darker slip or glaze. The first two have also had coloured slip added after my return to Preston, and the first some coloured glaze too. The red slip has cracked and flaked in places -perhaps because it is a thick layer and the slip not made with the same base clay. The third one is still green ware with the two layers of slip. I made one large piece to take away and fire, together with several components with which I could make another. All were still quite soft so I had to remake the base and lower front of the largest on return to Preston but, armed with my new confidence in dealing with large slabs, this was a nuisance not a problem.
Here it is, still as greenware, as is the one below. I have taken the opportunity to scratch through. The piece with definite base will be easy to glaze (or not). All the macquettes however look best laid tilted on a curved plane.I now see why neither Rebecca nor James routinely use glaze to decorate.
These pieces are part of my skills development and not really part of the MA work, but I will post pictures once they are finished.
|
AuthorI am indulging my passion for ceramics by undertaking studies for an MA at UCLAN Archives
August 2021
|

 RSS Feed
