|
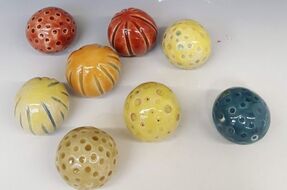
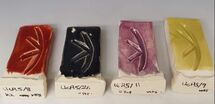
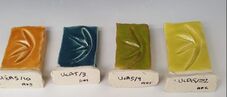
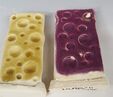
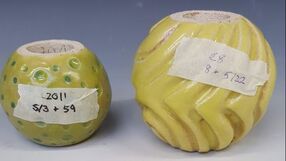
The two new 2 part moulds are now dry enough to use. I have been busy making editions of these larger spheres to 'fill in' the size range between the majority of my existing shapes, Which are up to 20 cm diameter, and the larger 'pumpkin'. Where I can, I am now rolling the clay to create soft slabs (around 2cm thick) with which to fill the moulds, reinforcing the joints on both the inside and out. Those reinforced joints need to dry and firm up before the piece is refined, smoothed, semi burnished, carved/ impressed then covered with a layer of sieved slip made from the same clay. The green ware piece then needs to dry slowly for several weeks before firing to bisque and glazing. this whole process needs time and I am running out of it...... I also have made more test tiles as I need to test each larger glaze production batch before using on a final piece so need more and more. I have made and tested version 6 of my glaze range, some over oxide, and some with slightly different stains or oxide combinations, though due to a lack of test tiles some colours have had to wait for a later firing and are not yet available to assess. I did find that applying a layer of oxide into the shallow impressed areas was difficult to do evenly and that when I then brushed on a glaze, the oxide was picked up and moved. I was aware of being more tentative with my glaze application because of this. The way round that problem would be to rebisque fire to fix the first layer of oxide or glaze, lengthening the production process further. Here are the test tiles of my version 6 glaze fired so far. All are Ashraf Hanna clay, with a final glaze firing at cone 8 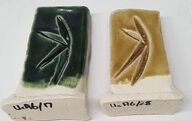 glaze 17 is a reliable green, containing copper carbonate and chromium oxide. It is more glossy than others in the range and might be worth adding 1% tin glaze 28 was a new trial colour using an orange stain and 'yellow ochre' iron oxide. Its a nasty muddy colour though looks better over copper (below) 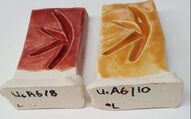 Glaze 8 uses red stain, and in this version small amounts of red iron oxide, light rutile and lithium. Glaze 10 has been named 'toffee'. It is based on a High temperature yellow stain with a little red and rutile added. In future I will add lithium too. 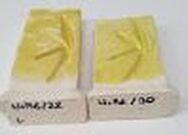 CTM had no High Temperature Yellow when I last ordered. The tile on the left trials on alternative, Sunshine yellow from Northern Kilns, and on the right the standard CTM yellow stain. Both seemed to work well 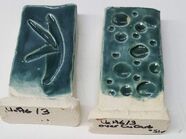 These tiles show the UcA6 /3 glaze (Teal), the right one over copper oxide 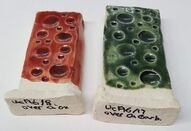 Both these dotted tiles had a layer of copper applied and wiped off. I had been too tentative with the application of the second colour, red and green. 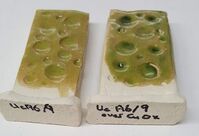 Chartreuse (UcA6/9) on a plan dotted tile and over copper 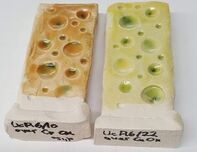 Toffee and yellow both over copper. 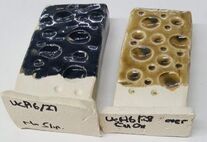 The left hand tile here has no slip and the glaze has crawled. The colour is a dark blue/grey so I have tried this glaze again with less tin and more cobalt. On the right is the orange ochre over copper. 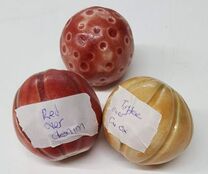 Three cane toppers.
The toffee 'growth topper had copper brushed into the indented grooves then two coats of glaze. the copper has been moved by the glaze application and is mainly at the apex. Refiring is essential.
0 Comments
Yesterday we had a group discussion with Rob about our progress, during which I received helpful feedback from everyone. We talked about the results of the UcA5 test tile firings
 and the combinations of colours on various cane toppers and totem components. As time goes on I m appreciating the value of careful notes and clear labeling more and more! The masking tape notes on these forms refer to the identity of the individual piece as well as the glaze applied
My review conclusions are:
and I need to make lots more pieces -especially the larger ones! More clay is on order. |
AuthorI am indulging my passion for ceramics by undertaking studies for an MA at UCLAN Archives
August 2021
|

 RSS Feed
