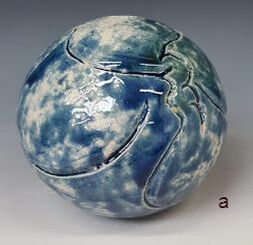
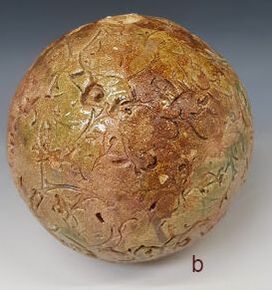
I have also used the early spheres as 'tests': a) is made from ES40 and carved, the glaze coloured with cobalt and copper. b) is craft crank and impressed with a printing block. I have used number of different test glazes; those shown here are mainly copper and iron
these have been sponged on and fired to 1260 in the electric kiln (oxidation). the results are pretty patchy, partly because of the difficulty getting good cover into the texture with sponging.
Next time, while I am in the process of trying things out I will experiment with brushing. This method has always served me well with commercial glazes containing a thickener, but may not work so well without.
0 Comments
 My next attempt at a small ball again involved carving in, a process I normally enjoy. Initially the I had allowed the clay to dry too much so my hand began to hurt. I enjoyed it more after spraying, wrapping and leaving for a while;just a little extra softness makes a big difference. I made the marks deeper and closer and was pleased with the finished result which I wiped over with a damp sponge(to even out the texture) and left to dry. Two days later:- 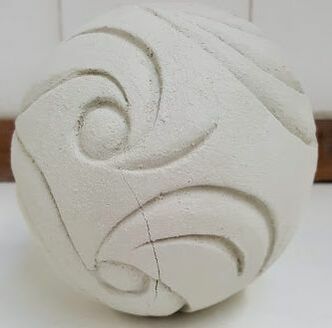 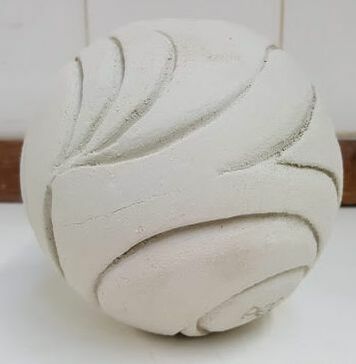 little surface cracks had appeared. Again this is most likely to be a wet /dry problem, and not wrapping to dry.
Again I have made a nice test piece for glazing. the message is WRAP and be patient -something I have trouble with. ps the glaze firing made little difference to the cracks, which probably confirms that the problem was the drying not the construction. it has not not happened again(so far...) 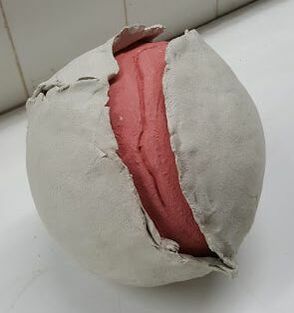 The next version of the larger 'growing ' ball seemed more successful. I let it (and the red slipped area) dry more before scoring and slipping and adding the 'surface crack'. I then set it to dry in the throwing room. Two days later......... DISASTER! 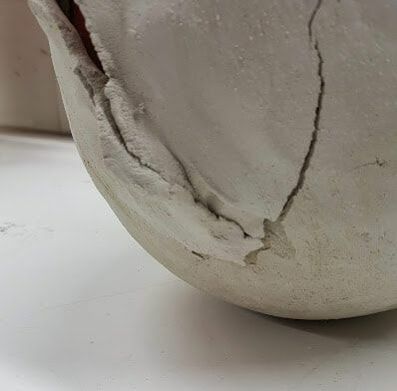 At the ends of the open edges the added clay has cracked and pulled away thus :-
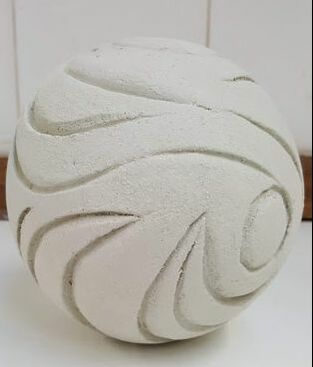
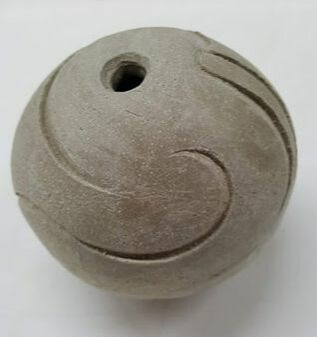
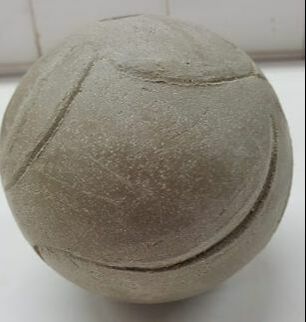
and I've made another test piece! What I thought was an advantage became a problem, as the ball below was too dry, compared to the additions which pulled away as they dried. In the more accessible middle areas (shown in the top picture) I had been able to smooth the clay on better and this process probably helped. If I had wrapped the ball and dried it slowly then that would have helped too. 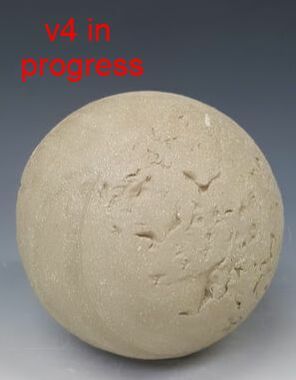 Its difficult to add clay to a press mould with out leaving lines where the pieces of clay have been added to each other. In addition there is the potentially prominent line where the halves have been joined. The dilemma is, do you make these joins a feature, even adding texture to the external wall before putting in the mould, or try and smooth them over.? if not smoothing then enhance the texture after removal from the mould, or carve in? I tried these options on the next two small balls. v4 was textured using an oyster shell, starting with an area of pre-existing texture v5 had some attractive but localised marks from the clay filling and I started to enhance these with a metal carving tool (central image). The lines spread all over the ball. Tutorial reaction? not deep enough! I want to see how it looks glazed.
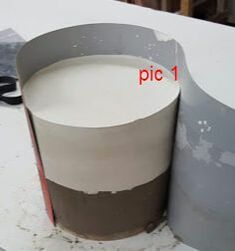
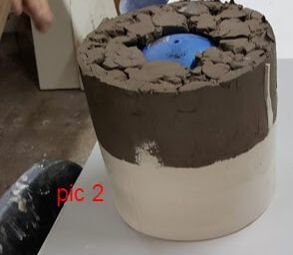
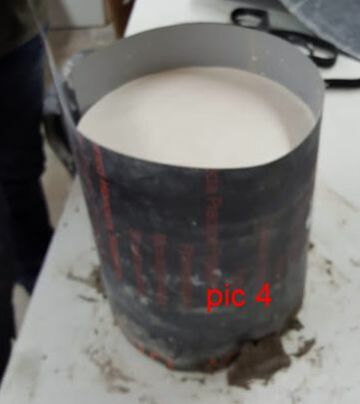
I needed moulds of my own, so new skills to learn. First a three dimensional object , in this case a sphere, is required. This used a borrowed ball, sat on a throwing batt 6cm greater in diameter than the ball itself. Plaster clay was used to build up a smooth topped wall to half way up the ball. (This stage is shown, upside down. in pic1 after the first half of plaster has been added). The vertical edge of the wall aligned with the outer edge of the batt. The challenge was to keep the midline of the ball horizontal. I used a set square. A thick plastic collar was then wrapped round and held in place by a strap and by clay at the base. The next stage is to mix up sufficient plaster. Five pints of cold water, 8lb 2oz fine architectural plaster, stirred gently to remove lumps and bubbles till thick enough to show a line was perfect. (pic1) This first half was left overnight to set. Next day the collar was removed and the form turned over (pic 2); plaster clay gently removed (pic 3) and three sloping steps cut in so that the two halves would sit together correctly. T.he top edge of the plaster was smoothed, the ball and plaster coated with soft soap and the collar replaced. Another 5 pints of plaster went on (pic 4), and another nights setting time. The circumferential edges were smoothed off to reduce the chances of them breaking, marks added to the outside to indicate how it should be put together -and voila! a perfect mould to be put aside and dried out properly.
This one is heavy enough, but I need to make bigger ones, and find bigger balls to model them on.
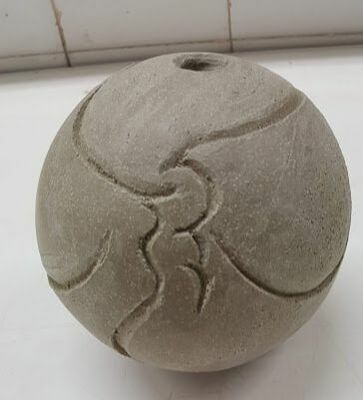
I have been thinking about forms for my garden ceramics. Any piece would need to be large enough to stand out and be seen, small enough to handle. The form needs to complement the living elements, be a contrast but not look too 'dead'. There needs to be enough colour to stand out, but not overwhelm the plants. In tutorial I have been encouraged to use the basic shape of a sphere, particularly if making multiples. My first attempts have been using a hemispherical plaster moulds (a large and a small one) to make spheres of different sizes. This means extracting one half and making another to fit, keeping dryness the same, then putting them together. 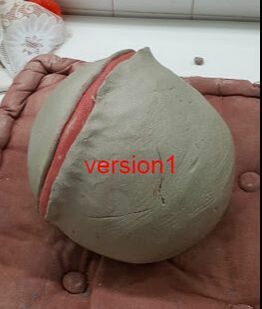 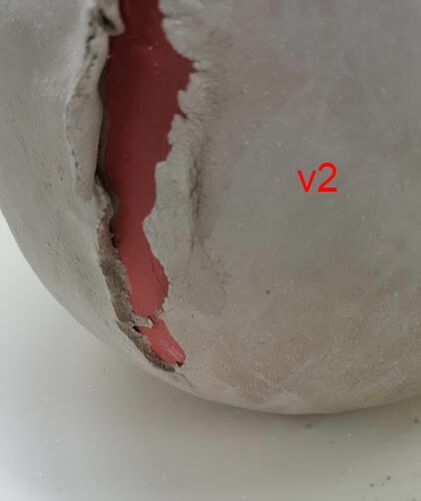 It is apparent my 'off the shelf' mould is deeper than a true hemisphere. In addition, the flattened coil I added, painted with red slip and edged with coils blended in just looks repulsive -like a tongue protruding. version 2 has no added protuberance and torn edges which do not extend so far round the sphere. Even so, in green ware they were still extremely vulnerable, as shown here where some edge has broken 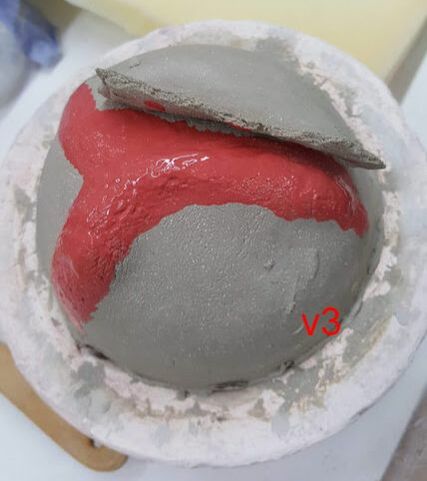 Version 3 was a smaller ball. This time I created a raised 'y'shape using finger pressure from behind, before putting the two halves together (the second half is still sitting in the mould for protection while I add the edges).
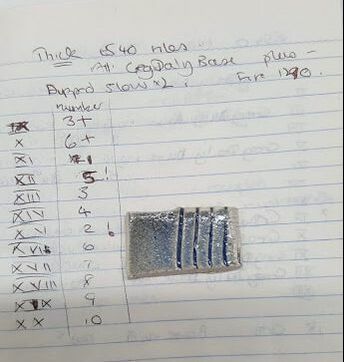
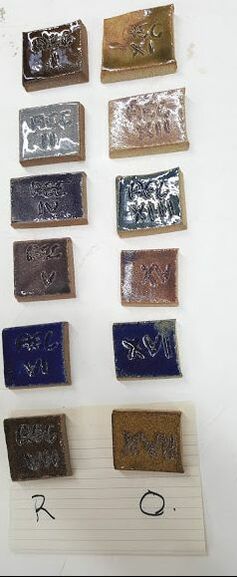
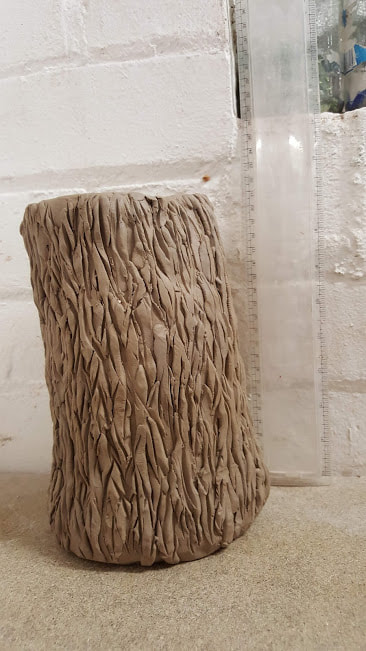
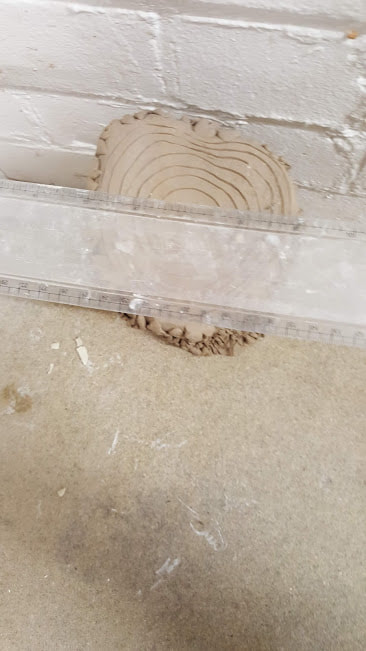
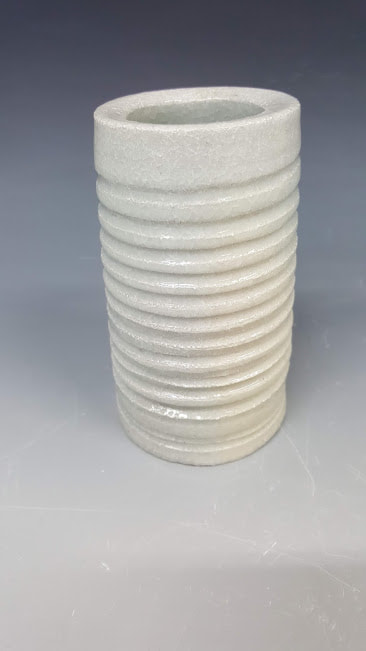
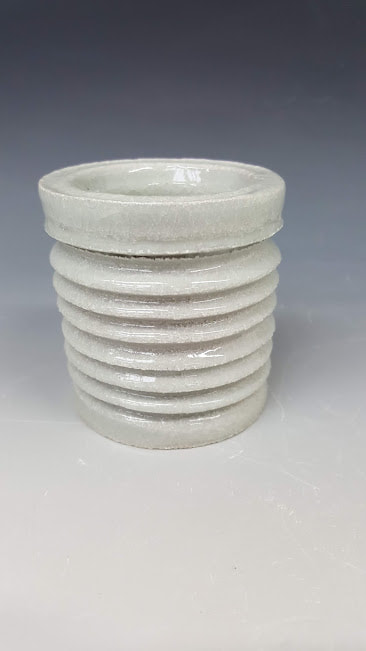
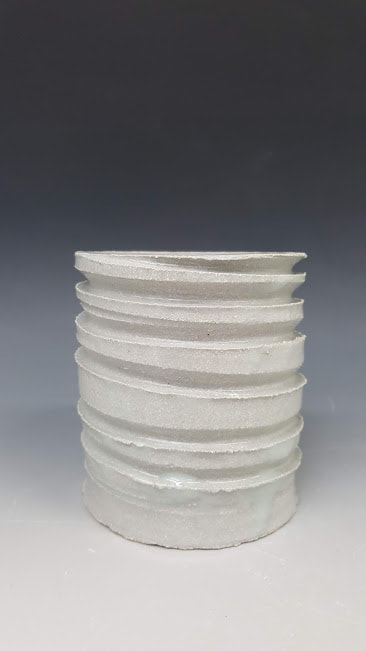
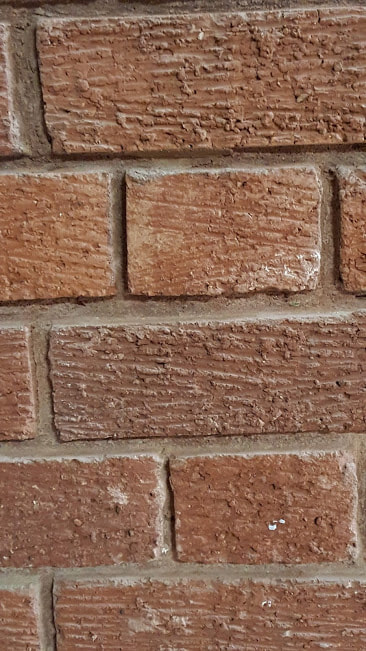
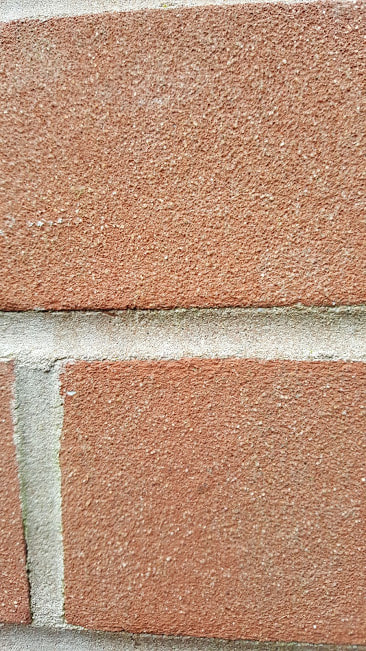
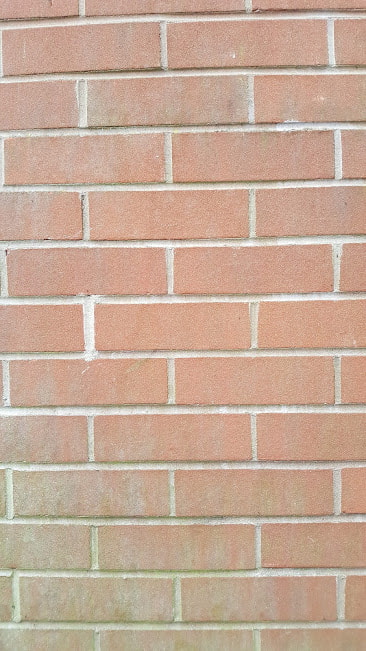
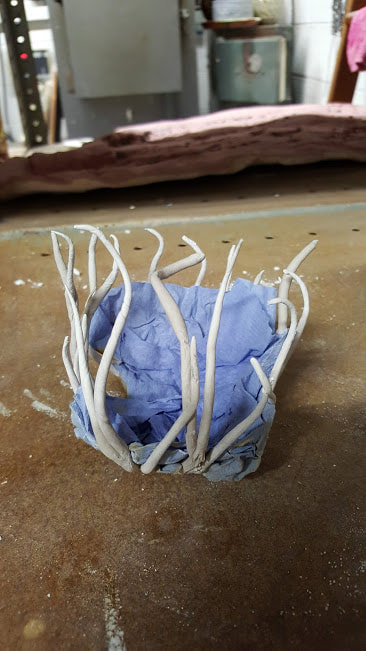
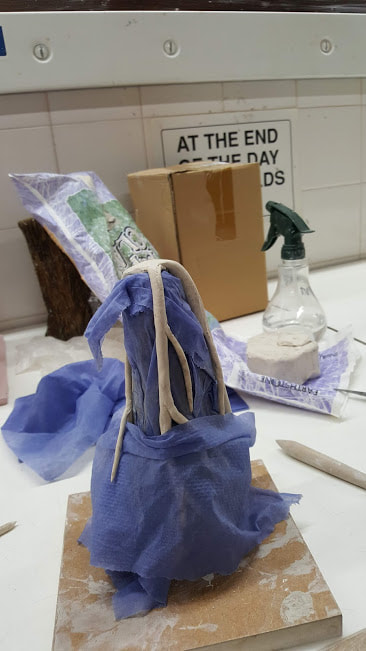
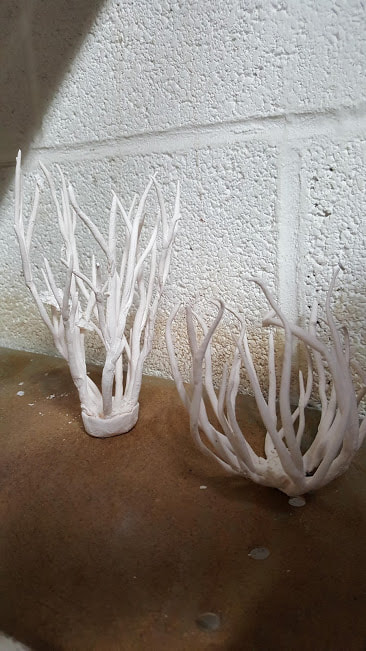
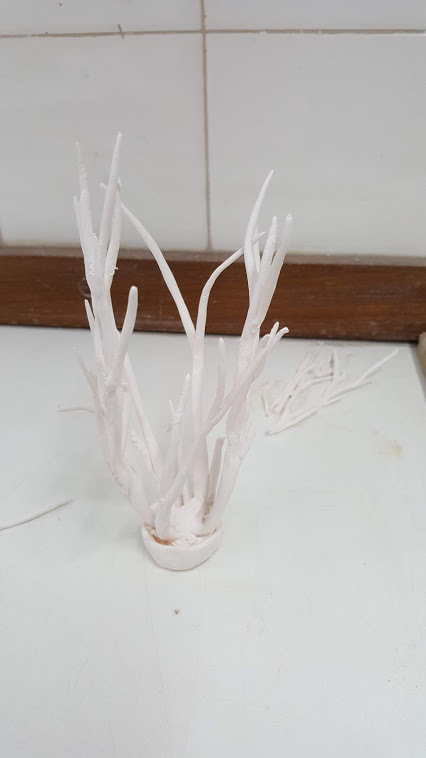
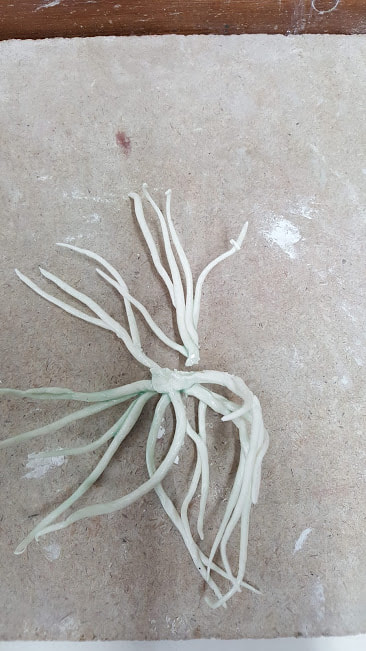
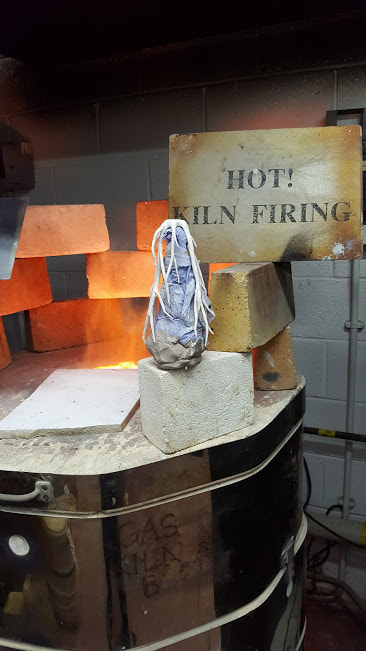
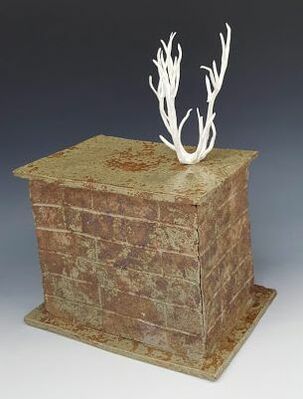
Both these two balls are in the kiln, but it was becoming clear I needed a mould of my own. No problem about deciding what to do - here's a project! The brief was to produce two pairs of pieces. One pair was to be a 'natural' stand supporting a 'mechanical' or 'manmade' vessel, the other a 'manmade' stand with natural vessel. After some consideration (and advice!) I decided on a cut branch as my natural stand.  The stand is handbuilt using St Thomas stoneware clay, fired and glazed at home using paint on glazes. For the manmade vessel I wanted to give the feel of a metal screw or similar machine part. Using Valentines ES40 I threw four very thick walled vessels and carved into them. They were glaze fired in reduction to 1280 using the parian glaze at UCLAN. The test tiles show this glaze in oxidation and reduction. I wanted to emphasise the carving by putting a darker glaze on the undersides of the 'thread', so added manganese to some of the glaze and tried directional spray applications. I knew that iron is very weak oxide but thought manganese stronger (maybe just more poisonous?) but need not have bothered; the difference in colour is minimal if at all. These are my glazed test forms: and this is the final piece. Rather than spraying, I had applied the glaze by dipping, as attempting darker shadows had been disappointing. 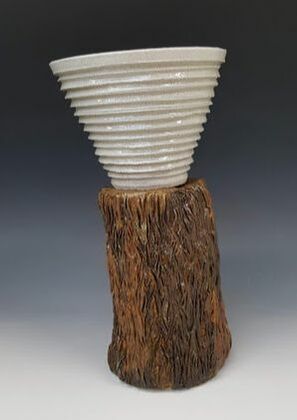 For the manmade stand and natural piece I was inspired by the budleija growing from the chimney of my local railway station. 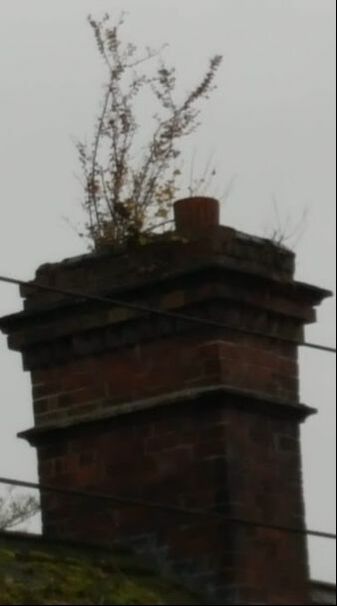 I looked at brick walls and made a 'chimney' form using the department recycled stoneware clay, textured using a wire brush. I made test tiles for the glaze. The final piece had the 'mushadon' glaze and oxide sponged on. 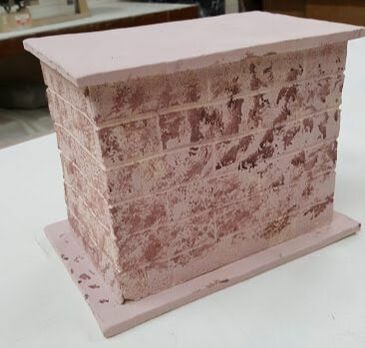 The plant form proved more challenging. I used paper porcelain clay which I handbuilt using paper towel to protect and support the form during building. I made version 1 at home: too thin, delicate but collapsed even at bisque. Even when made thicker, up side down over a clay prop it collapsed at the second firing. The final version had to be force dried on its prop, then fired (this time upside down ). The last two versions had celadon glaze applied to areas that I hoped would not touch anything (for the final piece this was at the green ware stage) but the glaze spread a little so leading to attachment to the prop and some breakage. I also had breakages at the bisque stage as they were so light -blowing on one to dislodge remaining ash blew it over -and more branches came off
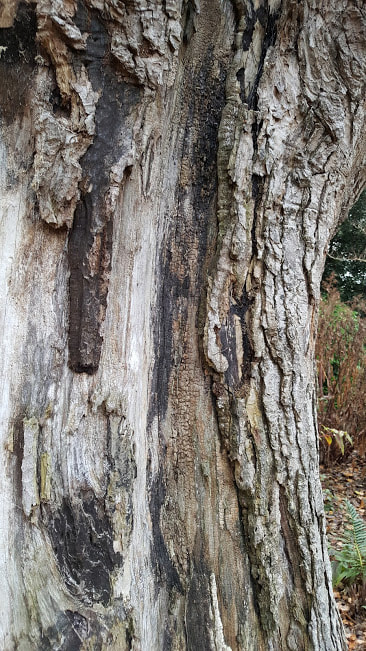
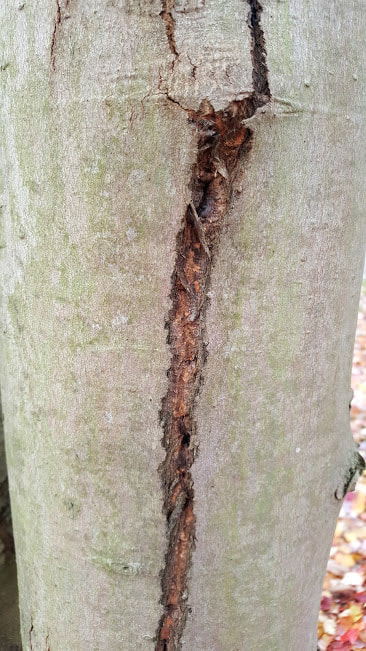
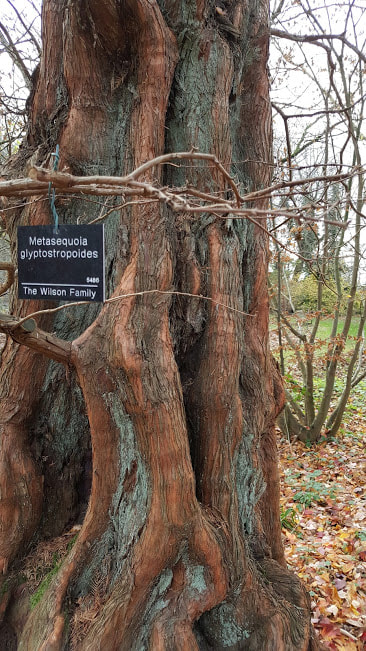
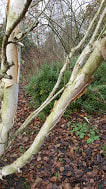
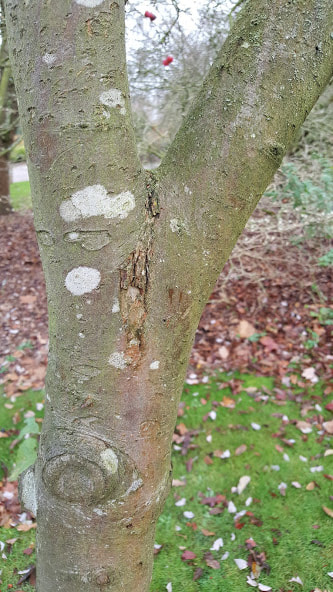
Autumn is a time for gathering in and consolidation but the first term at UCLAN seemed very disjointed and I felt I need more inspiration and direction. Three things helped. The 'Research and Contextual Review' encouraged me to access the resources of the Lindley Library, to read more widely and carefully than I might have done, and license to be more critical. I found Janet Mansfield's and Karin Hessenberg's books helpful in documenting the breadth of possibilities, as well as highlighting the practical issues for makers of garden ceramics. The review of garden gnomes emphasised the very personal nature of our relationship with gardens, and the books on ornament and sculpture the potentially public face. Writing the essay was interesting and useful. I gained a much deeper consideration of the relationship between a ceramic piece and its surroundings. This research process however did not help my ideas on what form my pieces might take. Secondly, I took the opportunity to visit the Knitting and Stitching Show in Harrogate and was overwhelmed by the colours. Soon afterwards I was at Ness Gardens. At this time of year, tree trunks and bark stand out as features. Some bark splits reflect trauma and healing, others the effect of life and growth in the structures below, bursting and stretching. It even gave me the germ if an idea.... |
AuthorI am indulging my passion for ceramics by undertaking studies for an MA at UCLAN Archives
August 2021
|


 RSS Feed
