|
While my carved pieces evoke the movement of wind and water in the garden. The dotted, impressed ones represent the soil and all its varied organic and trace element constituents. They also recall the celestial orbs - our sun, planets and moon that have such an influence on earthly garden plots. Both the carved and dotted forms are burnished after the joins have been strengthened and the shape refined. Impressing the dots does not result in widespread micro holes and so far the glaze had not crawled on these except when too thick or I tried dipping not brushing. 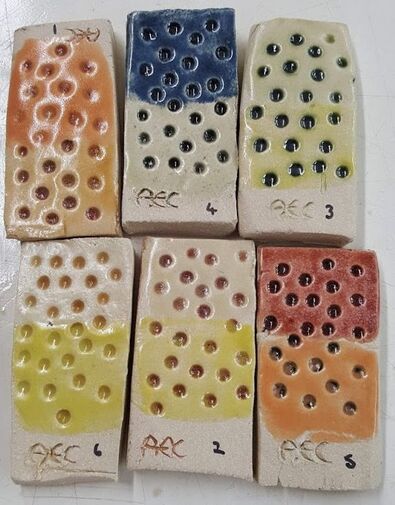 I had tried combinations of my glaze samples on dotted test tiles with the first layer wiped off, but not these combinations on the 'real thing'. Time to try on a few small cane toppers. Although I have designed the glazes not to run and these have flattened bottoms from which I will wipe the glaze, there is still a concern they will stick to the kiln shelf. I want good colour coverage and no obvious white base when they are elevated on a stick. I needed to test these on the dotted cane toppers, so made up some more glaze and applied. I used different thicknesses and layers of glaze, marked each piece, made careful records and waited for the fired results.  Slight hitch. I used blue underglaze crayon to mark them on the base where the hole was too small to do it inside the hole. I thought this was a really good idea, until I saw them after cone 6 firing and THE MARKS HAD DISAPPEARED!
these two retained a hint of the mark which has been touched up; the rest I have had to work on a guess. This is no good where there are so many little similar pieces. The glaze crayon worked fine where I had been able to mark inside the hole, but for these I will need to move on to using manganese in suspension.
0 Comments
Leave a Reply. |
AuthorI am indulging my passion for ceramics by undertaking studies for an MA at UCLAN Archives
August 2021
|
 RSS Feed
